 |
Pepper 3.7.0
A highly extensible plattform for conversion and
|
|
Pepper 3.7.0
A highly extensible plattform for conversion and
|
Download Eclipse from https://eclipse.org/
Step 1 Open the Import dialog via: 'File' -> 'Import...'
Step 2 Choose the type, how to import your project: 'Maven' -> 'Existing Maven Projects'
Step 3 Select Directory MY_MODULE_HOME (the pom.xml should now be automatically selected)
Step 4 Click: Finish
Your module should now be imported into Eclipse.
Step 5 Right click on your project and choose Run As -> Maven install
Debugging in Eclipse is quit easy, Eclipse provides a debug mode, where it is possible to proceed your module step by step, analyze specific variables or methods and so on. With breakpoints you can stop the processing of your module at any line of code and go on step by step. To debug your module in Eclipse which is running in Pepper, you need to link Eclipse to a different VM (the VM which was started by Pepper). How to do this is explained in the following:
Step 1 Set a breakpoint at a place in your code for which you are sure it will be processed. For us a good point to start is the constructor of your module. Go to a line in the constructor and press 'Ctr' + 'Shift' + 'B'. A blue point will appear next to the line.
Step 2 Open the Debug dialog via: 'Run' -> 'Debug Configurations'
Step 2 Search for the entry 'Remote Java Application' and right click 'New' 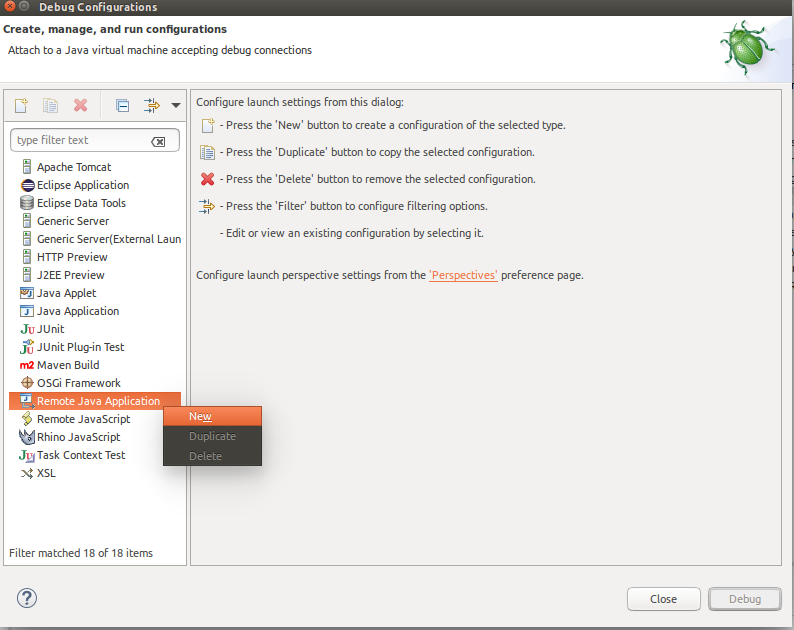
Step 3 Set the configurations as follows:
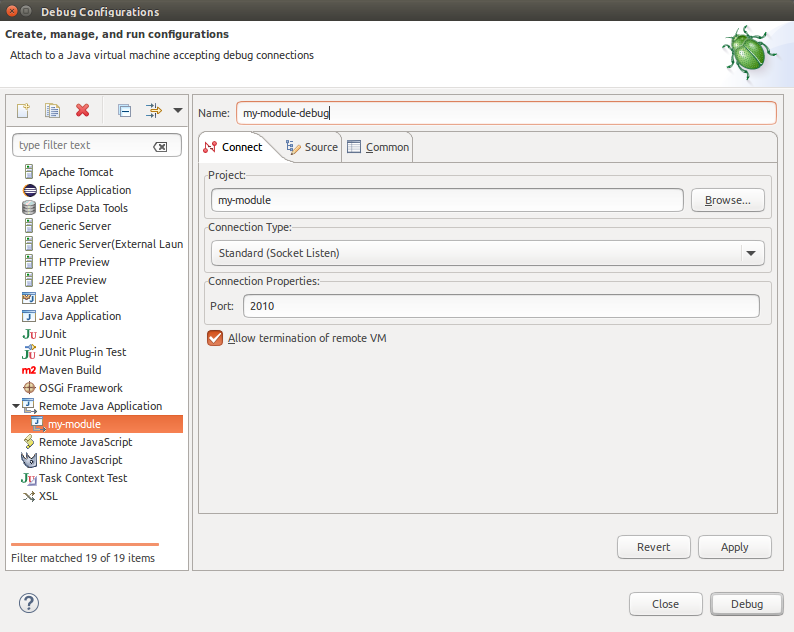
Step 4 Click 'Debug'. Now Eclipse will start the debug mode and will wait until Pepper is started at port '2010'.
Step 5 Go to PEPPER_HOME and start Pepper. Note, that it is important to start Debugging first. Do not forget to point Pepper's dropin path to the target folder of your module and to run 'mvn install'.
Step 6 To trigger Pepper accessing your module, use the 'list' command. Pepper will create an instance of your module to display information about your module. This is a simple trick to start your module, but you can also create a workflow including your module to let Pepper invoke all methods of your module.
Step 7 Eclipse now stops in the constructor, where you set your breakpoint. 
Step 8 With the 'Step into' and 'Step over' you can proceed step by step. 
If you are not family with Debugging in Eclipse, take a look at this tutorial: http://www.vogella.com/tutorials/EclipseDebugging/
When debugging your module it might be helpful to step into Pepper's source code. Therefore you need to import it into your Eclipse instance and to link the code with your debugging. Afterwards you can step through Pepper's code in the same manner as through your module's code.
Step 1 Checkout Pepper's source code from https://github.com/korpling/pepper to PEPPER_SOURCE. Make sure to checkout the very same version of Pepper as your Pepper instance in PEPPER_HOME.
Step 2 Import Pepper in Eclipse via Open the Import dialog via: 'File' -> 'Import...'.
Step 3 Choose the type, how to import your project: 'Maven' -> 'Existing Maven Projects'.
Step 4 Right click on your project and choose Run As -> Maven install
Step 5 When stepping through the code and Eclipse does not automatically find Pepper's sources, click on 'Attach Source...', choose 'Java Project'and select the Pepper project.
Now you can also debug through Pepper and the interaction between Pepper and your module..